Designed by golf course architect Denis Griffiths, the Brasstown Valley Resort & Spa Golf Course offers a well-bunkered, Scottish links-style layout with rolling hills and bent grass greens.
Water comes into play on 10 holes as the golf course winds through wildlife preserves, ponds, and streams. With five sets of tees, all skill levels will be able to enjoy this magnificently maintained layout. As one of the most environmentally sensitive courses in the United States, Brasstown Valley Resort & Spa’s links use only 13 of its 210-acres of woodlands. This course is naturally gorgeous.
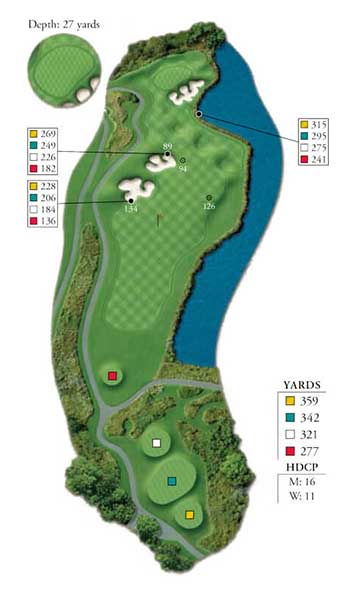
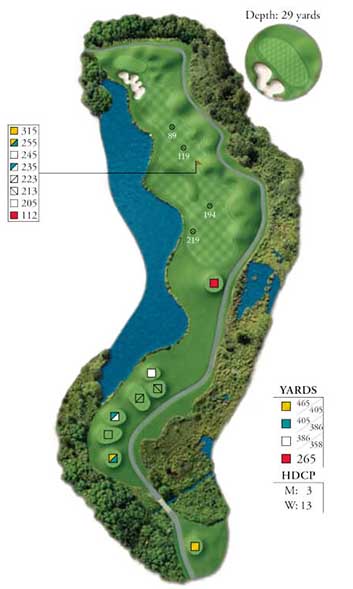
This opening par 4 can be intimidating. Tee shots, after carrying the ravine, should favor the right side of the fairway. An extra club is required to reach the elevated green.
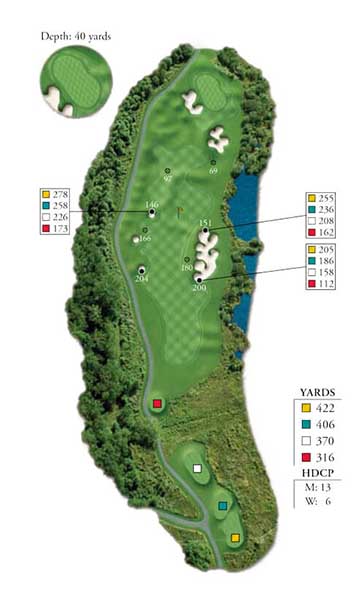
No. 2 | Par 4
No words do this par 4 justice; it stretches over 400 yards and is guarded by bunkers on the right and out of bounds on the left. Favor the left side from the tee and avoid the bunkers. Short and left is the “ideal” miss on the approach shot.
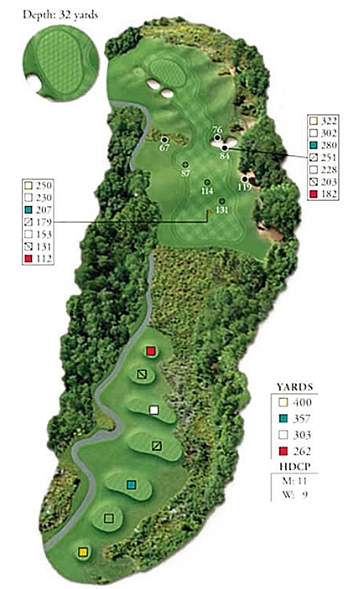
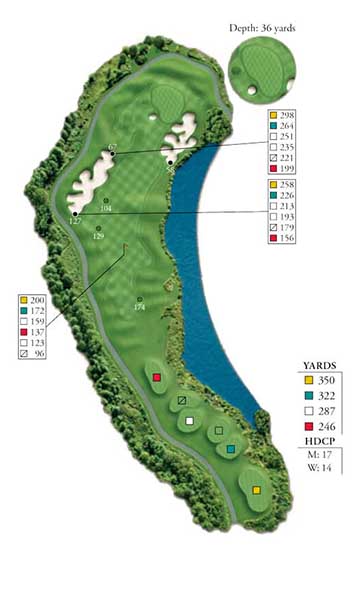
No. 3 | Par 4
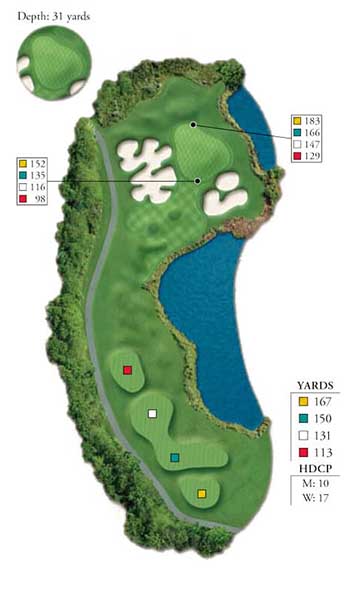
Water guards the right side of this short par 4. The prudent play is a long iron or a fairway wood to the center of the fairway. Favor the left side of this small green, avoiding the bunker and water on the right. Your putting skills will be tested.
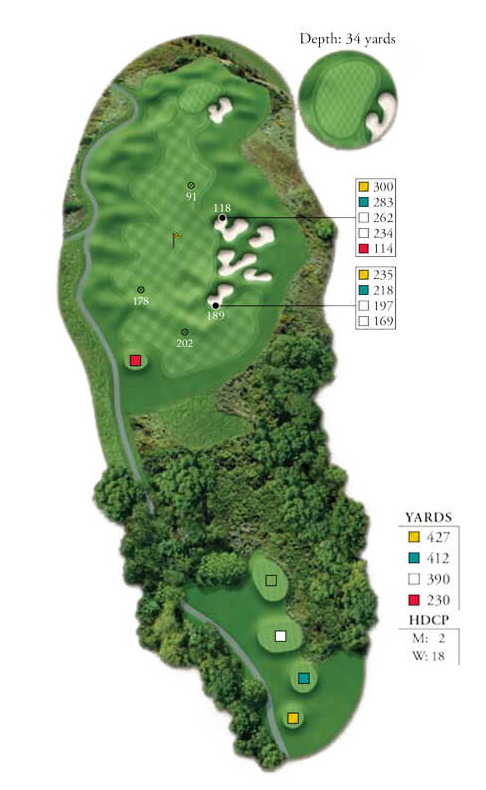
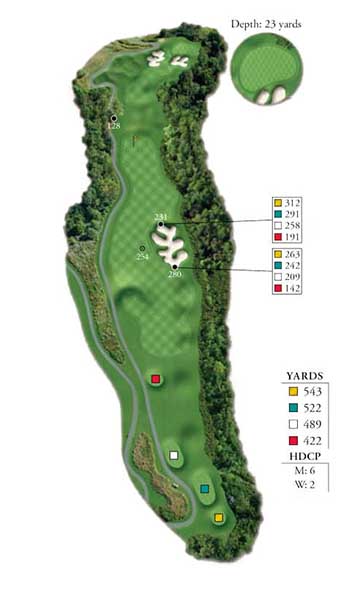
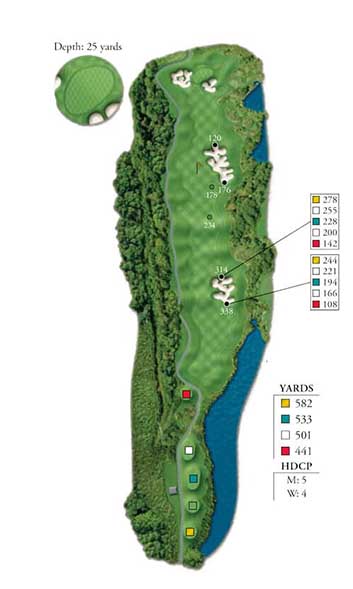
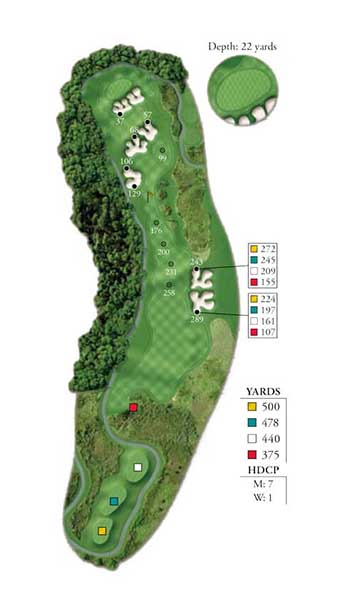
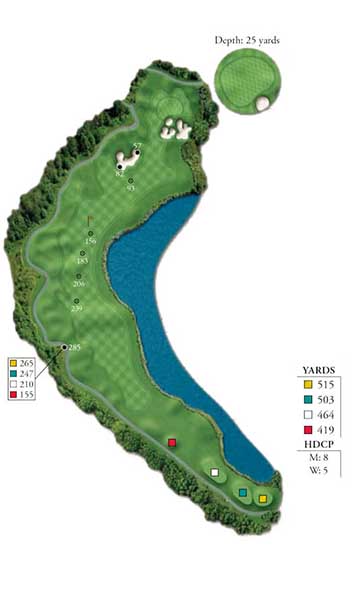
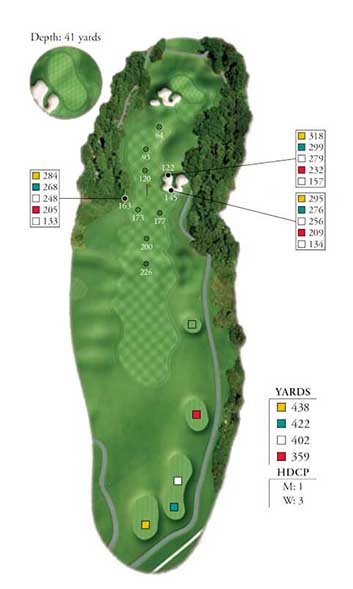
No. 4 | Par 5
Keep it in the short grass and favor the left side from the tee on this long, three-shot par 5. A precise lay-up with your second shot will leave you in good position for the approach. Long is gone, so don’t fly this small green.
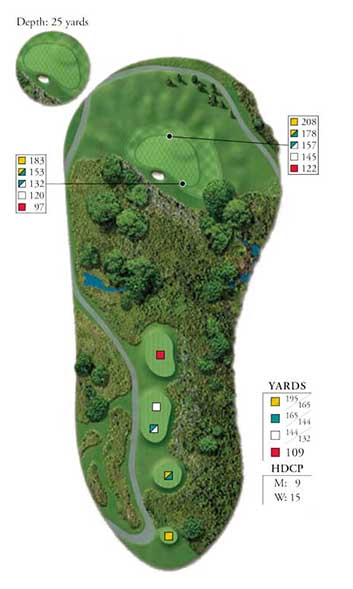
No. 5 | Par 3
This medium-length par 3 plays to a sloped green. Don’t come up short or you will have to re-tee, hitting your third shot. Aim for the center of the putting surface.
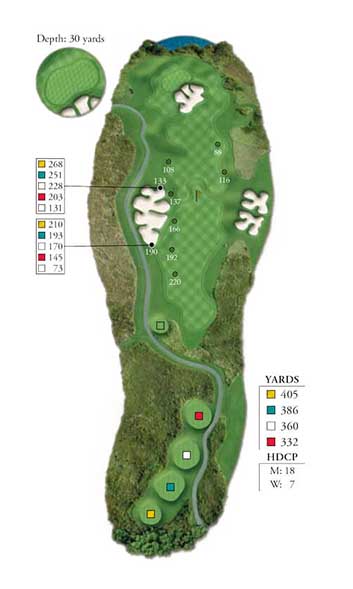
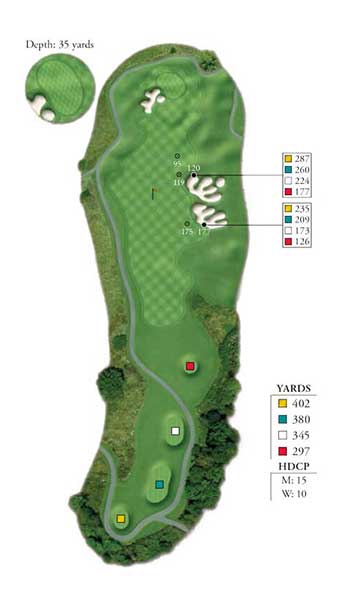
No. 6 | Par 4
Hit it hard and straight on this long par 4, favoring the right side of the fairway. Hit it hard again with your second shot to a small green that slopes from right to left and back to front.
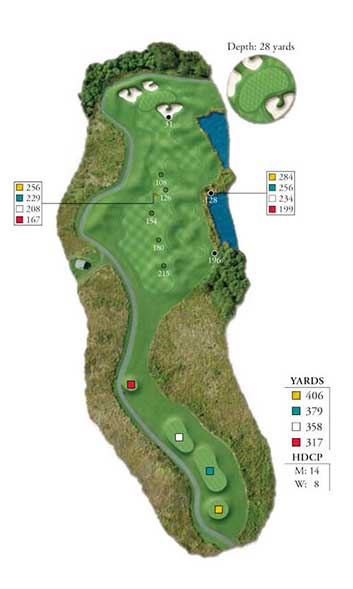
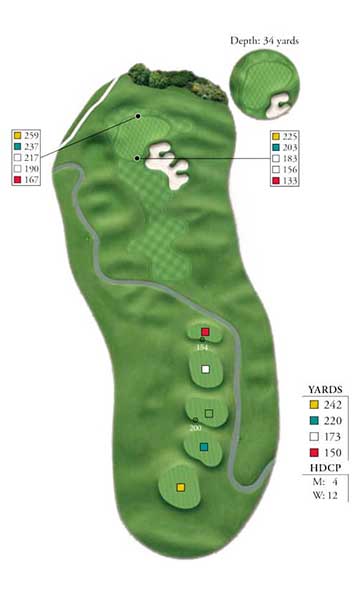
No. 7 | Par 4
On this long but generous par 4, favor the left center of the fairway with your tee shot. Coming up short with your second shot is not bad, but going long and right is a definite “no-no”.
No. 8 | Par 4
Hit a long iron or a fairway wood from the tee on this par 4, the shortest one on the course. Avoid the trouble on the right with you short second shot, and favor the left center of the green.
No. 9 | Par 5
A straight tee shot that avoids the bunkers on the right is a must on this three-shot par 5. Your second shot should favor the left side, which will open up the green for a short pitch.
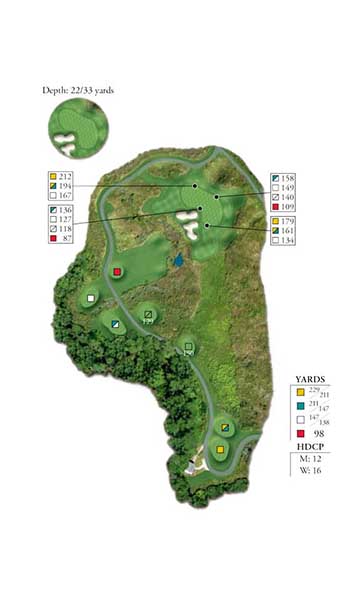
No. 10 | Par 3
Proper club selection is critical to your success on this long par 3; if you come up short you will have to re-tee, lying three. This green slopes from left to right and back to front, so hit your shot to the back of the green and two-putt for par.
No. 11 | Par 5
This relatively-short par 5 can help your score. Avoid the bunkers that guard the right side of the fairway off the tee. The second shot offers a classic risk/reward choice. Big hitters can carry the bunkers and reach in two while mere mortals should lay up behind the sand for a short approach shot.
No. 12 | Par 4
Avoiding the bunkers that squeeze the fairway with your tee shot leaves you with a short-iron approach to this elevated green. If you miss short and left, you can still get up and down and make par.
No. 13 | Par 4
Hit your drive down the left side to set up your second shot. Avoid hitting it short and right where all the trouble is. Just like on the previous hole, if you miss short and left, you can still get up and down and make par.
No. 14 | Par 3
Even though this is the shortest hole on the course, this par 3 requires great distance control. Check the wind before making your club decision.
No. 15 | Par 5
Favor the left side off the tee on this dogleg right par 5. Place your second shot short and to the left of the green, setting up an easy chip and putt for par.
No. 16 | Par 4
There is really no “danger” on this hole. Grip it and rip it from the tee while avoiding the right side of the green with your second shot and par should be yours.
No. 17 | Par 3
Hole location determines how this long par 3 should be played; when the pin is back right, play for the middle of the green. However, you can get more aggressive with a front or middle pin. Avoid the bunker on the right at all costs.
No. 18 | Par 4
This long, finishing par 4 plays well over 400 yards. Favor the left center off the tee and make sure you have enough club on your second shot. Missing short or long to the right of the green is OK, but avoid going short and left.
“Take the advice of someone who has played golf for 50 years and is a 5 handicap. The design, scenery and condition are all tremendous. Multiple tees make it playable for all.”
Equani Spa is open weekdays: Monday through Saturday & Closed Sunday. Hours may vary. We recommend booking spa appointments in advance.
Monday through Wednesday are considered weekdays & Thursday through Saturday are considered peek-time.
• Please call 706-379-2336 to schedule spa reservations. • Spa guests must be 18+. Children ages 12+ may have manicures/pedicures without adult supervision. • Please inform your therapist if you have any allergies, are pregnant, or if you have any medical conditions. • We recommend arriving 15 minutes before your appointment for the completion of registration and to provide time for the changing room. • Valet parking is available at the Resort for Spa guests. Please notify the resort concierge if complimentary shuttle service is needed. • Complimentary use of steam rooms, hot tub and relaxation areas are included with treatment bookings. • Please bring swimwear for the outdoor hot tub located on the Relaxation Deck.
• Therapists may not be able to complete a full service if arrivals are late. Payment in full will still apply. • A 20% commission fee is added to all services. Additional tipping is at your discretion. • Gift Vouchers and gift cards are non-refundable. • Please refrain from wearing jewelry as the spa does not have safe-locking storage. • For the comfort of all guests, this is a non-smoking facility. • Phones must be on vibrate only. All calls must be made outside of the spa. • Please note that pricing is subject to change. • We require a 72-hour notice of cancellation. Any services not cancelled within 24 hours before appointment time will be charged in full.